
Angie Herrington with Julie Morrison, Mandy Moses, and Mindy Moses
St. Ambrose University Children’s Campus
Davenport, Iowa
2011
The project described here was undertaken in the Dragonfly classroom at the St. Ambrose University Children’s Campus in Davenport, Iowa. The Children’s Campus serves children ages 2 months to 5 years old. Children’s Campus teachers begin exposing children to inquiry-based learning in the infant room. Consequently, many of the 3- to 5-year-old children in the Dragonfly class had lots of experience with project work prior to participating in their project on cows during 2011. Children in the Dragonfly room attend full-day, 5 days per week. The Cow Project began in June and continued until August 2011. Sixteen children were involved in the project. The Dragonfly classroom has one lead teacher, an assistant teacher, and a student worker.
Phase 1: Beginning the Project
The Cow Project began after an extensive lunch table conversation. The children were discussing where milk comes from. Several children said, “It comes from a cow,” while others said, “No, it comes from the grocery store.” I asked, “How do you think the grocery store gets the milk?” This question led to the children challenging each other’s thinking about how the milk might get from a cow to the store. The children in the Dragonfly classroom are accustomed to doing project work, and one child said, “We should learn about cows!”
One of the first questions related to cows was, “How does the cow get milk in its thing?” This question led the children to begin the research to find out what “the thing” was called. We did most of this research by looking at books and by looking on the Internet. A common phrase in our classroom is, “Let’s google it!”
The teachers helped the children make a list of what they wanted to find out about cattle. These were their initial questions (with the initials of the children who asked the questions):
Cattle Questions
- Can calves grow udders? (AP)
- When does a calf stop nursing and start eating grass? (AH)
- Do cows have toes? (AP)
- How do cows and bulls take a bath? (NK)
- Are bulls born with horns? (BG)
- Do all cows have spots? (AH)
- Do cows chew all day long? (AH)
- Why do some cows have tags in their ears? (AP)
- Why do some cows have rings in their nose? (BG)
- Are udders the same size? (AH)
- Why do cows have leashes? (CE)
- Do all cows produce milk? (KT)
- Do bull horns grow? (JM)
- Where do cows sleep and eat? (NK)
- How do cows get more milk in their udder? (AH)
Phase 2: Developing the Project
After we finalized our questions, which took about 10 days of looking at books and online resources, we began to talk about who could answer our questions. The children suggested, “The grocery store!” We discussed whether or not someone from the grocery store could answer the questions about the cows. Another child suggested, “A farm!” I asked, “Do you think any farm would work, or do we need to find a dairy farm?” I then brought in a nonfiction book titled Dairy Farm. Julie, the assistant in our classroom, had an acquaintance who is a dairy farmer, and she asked the children, “Do you think we could find a farmer to answer our questions?” She then shared with them that she knew of a dairy farmer and would get in touch with him to see if we could visit his farm. She was able to arrange a site visit.
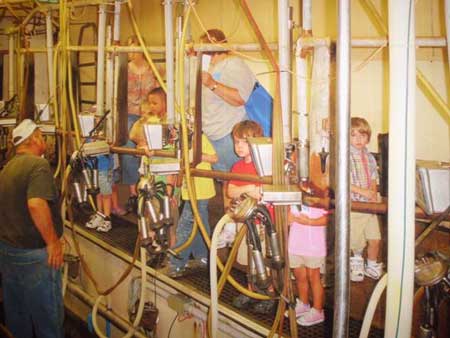
When we got to the farm for our site visit, the children did not like the smell. They asked, “Why does it smell so bad?” I asked, “Why do you think it smells bad here?” The children said, “Because the animals don’t take a bath here cuz they live outside!” We met Farmer Randy, who took us to the barn where the cows are milked (Figure 1). In the barn, Farmer Randy demonstrated how they first clean the teat on the udder with iodine. He explained that the teat must be cleaned to be certain that the milk that is collected is as clean as possible.
He then turned on the milking machine and invited the children to place their finger in that part that fits on the cow’s teat so that they could feel the suction. Some children were nervous about putting their fingers in, but after the first child tried it and said, “It doesn’t hurt!” more children tried it. Farmer Randy then demonstrated putting the machine on the teats and showed the children the tubes that the milk goes through to get from the cow to the large metal container where the milk is collected (Figure 2).
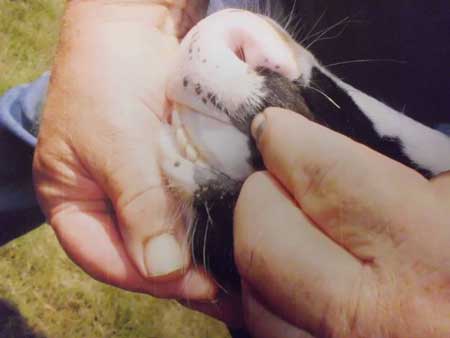
Because the children were interested in calves as well as the full-grown dairy cattle, Farmer Randy had put a calf in the yard where the children could observe and touch it. He showed them the inside of the calf’s mouth so they could see that cows have no top teeth (Figure 3) and that a cow’s tongue is extremely rough. He told the children that cows chew from side to side because they have no top teeth and that cows mush the foods by scraping the bottom teeth against the top gums. He also told them that cows’ tongues are rough to allow them to scoop up the food that they want to eat.
The children were curious about the tags that the cows wore in their ears. Farmer Randy explained that the writing on the tag is like the cow’s name, except it is a number. Several children were also interested in the bull and why it had a ring in its nose. Farmer Randy explained that the ring was to be used when the bull began to charge. The ring, when twisted, hurts the bull and makes him stop.
After the field site visit, the class returned to the classroom, reviewed the questions, and recorded the answers on the question web. At that point, the children decided that they wanted to make a cow: “We need to make a cow.” The first thing they decided was that they needed tubes to create the legs. Then the children looked at a picture of a dairy cow and said, “We need a box.” I asked, “Why do you think a box would work?” The children said, “Because it’s a square, and the body of the cow is a square.” We went to the storage room where we found a box and some black and white paint. Several of the children said, “We need to paint it white with black spots.” We talked about the fact that not all cows are black and white, but Farmer Randy’s dairy cows are all black and white.
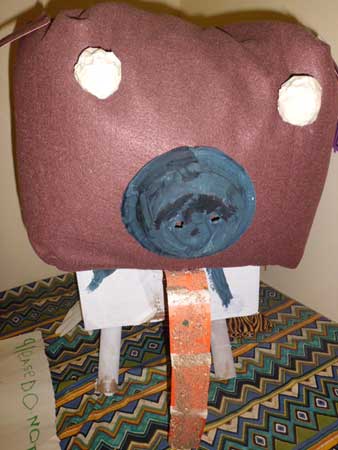
Once the children had finished painting the box, they began to consider how to create the head. The teachers had borrowed a cow skull for the children to investigate and had put it in the science area. At first, the children wanted to use the cow skull as the head of their cow construction, but they soon realized that the skull was too heavy and would not stay up. We returned to the storage room with the children, where we found a bag of polyfill and felt. The children decided to wrap the polyfill with the felt for the head. They then added ears. A farmer had lent the class a real ear tagger; the children used it to make a hole in the cow’s ear and to place a tag in it.
The children attempted to put “google eyes” on the cow face, but they would not stick and appeared to be too small. Charlie said, “It needs bigger eyes that will stick.” He got out masking tape and rolled two tape balls, which he placed on the cow face. He also painted a disposable bowl black and used a pencil to poke the nostrils into the bowl. Charlie also remembered that the cow tongue was rough so that it could scoop food into its mouth. To represent the cow’s long rough tongue, he found small cards, which he taped together. We had a discussion about how to represent roughness on the tongue. Some children suggested putting sand on it. We then had an interesting discussion about what kind of glue would hold the sand on. Based on past experience, Charlie said, “It’s not going to work because it won’t hold it.” He explained that dotting glue would only make dots of sand on the tongue. I asked, “What would be another way we could get glue on there?” He then had the idea of using a paintbrush to paint the glue on the cards. He spread glue across the entire strip and placed it into the sandbox (Figure 4).
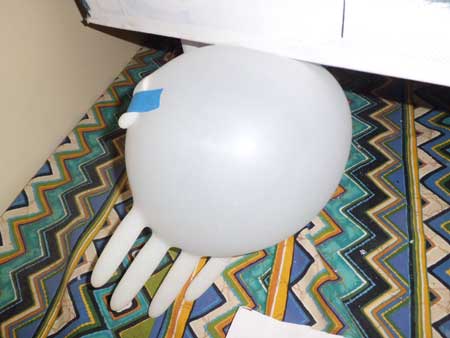
The children suggested that we use a balloon to represent the cow’s udder. A teacher blew up a balloon, but the group decided it didn’t look right, because it did not have the teats. During a discussion about how to represent the teats, a child said, “What about the bathroom gloves? Could we blow one up like a balloon?” When the glove was inflated, the children noticed that this “udder” then had five teats, though it needed only four to be accurate. Discussion ensued about how to make the glove have only four fingers to represent the four teats. Audrey suggested taping down one of the inflated fingers so it would not show. Using packing tape, she taped down a finger and was satisfied with the result (Figure 5).
When the children had created all of the pieces of the cow, the task of putting them all together was at hand. The children remembered that in the past we had used a hot glue gun to assemble their representations. The teachers got the glue gun out, talked about its safe use, and used it to help the children put the cow together.

Phase 3: Concluding the Project
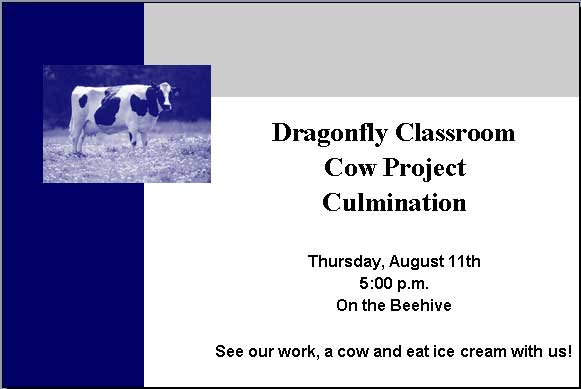
When the cow representation was complete, it was time to celebrate the learning that occurred during the project. The children and I participated in a conversation about who we wanted to invite and what we wanted to do for our celebration. Immediately, the children decided that they wanted to have snacks that were directly related to cows. They decided to have ice cream and milk as the snack. They also decided that they wanted to invite their families to come. Several children asked, “Could Farmer Randy come and bring a cow?” Together we talked about why it would not be a good idea for Farmer Randy to bring one of his cows to our school; however, we did have a student employee, Mandy, whose parents have cows on their farm. The teachers and children asked Mandy if her mom and dad would be willing to bring a cow from their farm to our school. It turned out that they had a 2-day-old calf that could come to the school. The children helped me to create an invitation to their families on the computer, and we printed one out for each family (Figure 6).
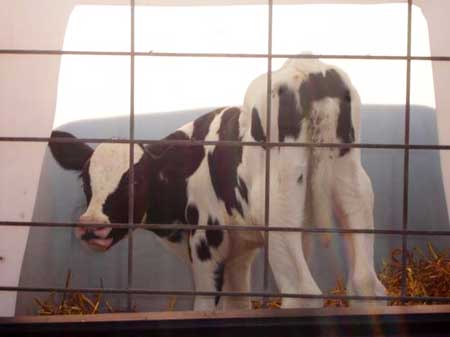
Prior to the celebration day, Mandy’s parents built a cage in the back of their pickup truck and loaded the calf into it (Figure 7). When they arrived at the Children’s Campus, they unloaded the calf and placed it in the grassy area of the school’s outdoor classroom (Figure 8).
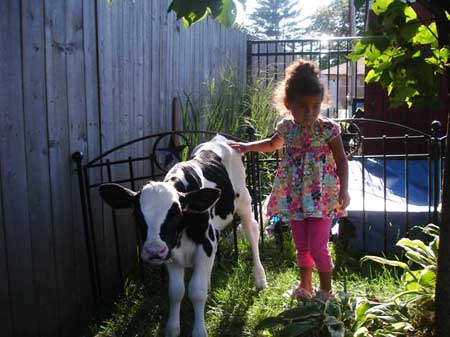
A teacher modeled how to touch the calf (Figure 9).
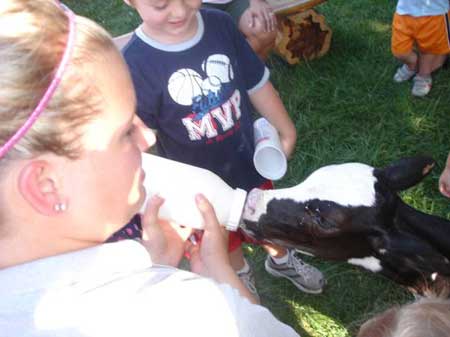
Mindy, Mandy’s sister, demonstrated how to feed the calf milk replacement from a large bottle (Figure 10). The children and their families took turns feeding it and were able to touch and interact with the calf.
The children also served the snack and ate with their families (Figure 11).
During this final event, work that the children had done was on display for visitors to see, including the web showing what the children already knew about cows at the beginning of the project, the list of their questions, their time-1/time-2 drawings of cows, and the large cow representation (Figures 12 &13). Also included was a web created by the class of types of foods that are made using cows’ milk.
One of the best parts of the celebration was that it took place outside at the time of day when many children were being picked up for the day. Therefore, families and children from all of the classrooms in our program were able to participate in the event and help the Dragonfly classroom children share the learning that occurred during the Cow Project.


Teacher Reflection
I consider this project successful for many reasons. Not only was the topic of high interest to the children and relevant to their lives, but it was also a topic that neither the children nor the teachers had much prior knowledge of. The questions that were generated during this project were genuine extensions of the children’s prior knowledge. Even the youngest children in the classroom became involved in sharing their prior knowledge and asking questions.
During the course of the project, the teachers witnessed children who had not yet drawn a representation doing so. Children who had not yet attempted to write did so. The teachers also observed children moving from 2-dimensional representations to 3-dimensional representations using clay (Figure 14), and they noted that children were using language that they had not previously used. Many children were able to consistently recognize, name, and write the letters c, o, and w. The teachers also observed important social interactions, such as children participating in conversation that challenged each other’s thoughts. A strong sense of community and teamwork emerged during creation of the large cow representation.

It was also evident that the confidence of the children grew as they were able to share what they had learned with their families. In many cases, they shared their new understandings with extended family members, as several grandmas and grandpas attended the celebration.
As teachers, we also learned that using the anticipatory web successfully allowed us to assess and target children who needed to work on specific skills and that they could do so through project investigation. Using the project to meet curriculum objectives allowed us to document the skills that children used and mastered during the project. The anticipatory web also allowed us to be certain that during the project, we were able to meet curriculum objectives from each domain and challenged us as teachers to create activities that would do just that.