
Meredith Kennedy and Michaela Martens
Bridgeview Elementary School
LeClaire, Iowa
2017
This project was an investigation of the afternoon preschool class at the Pleasant Valley Preschool Program. Our program serves children ages 3 to 5. The classroom is inclusive and made up of 17 students. The Pumpkin Project began in October and lasted until the end of November.
Phase 1: Beginning the Project
In the fall most students begin to see lots of pumpkins, whether in decorations at home, on a trip to the pumpkin patch, or at the grocery store. When asking the children about what they did during the weekend, many of them talked about the growing collection of pumpkins in their home or about a recent trip to the pumpkin patch. We noticed the shared interest and decided it would be a good time to begin a project on pumpkins.
Our classroom has access to a variety of fiction and nonfiction books about pumpkins, and we were anxious to begin a project with appropriate timing and rich opportunities for a literacy connection. By beginning this project, our goals were that the children would learn about where pumpkins grow, the life cycle of pumpkins, and how pumpkins can be consumed.
The following week we brought a few small real pumpkins in for the children to explore. Additionally, we used some nonfiction books and encouraged the children to paint what they saw. From there the children started to notice that the traditional orange pumpkin started out green, and we wondered why and when they would turn orange!
We used a private Facebook group as a way to communicate our learning with parents through photos, videos, and notes. We requested that parents send in any photographs of trips to the pumpkin patch, or any real pumpkins. Our families did send photographs of the children at the pumpkin patch. During our large group instruction, we looked at a large real pumpkin sent in by one of the parents. We encouraged the children to sketch everything that they noticed about the pumpkin. The following were some of the comments made by students on their sketches:
- “There’s a stem and it was on a vine, and there’s dirt on it.” – JG
- “It has seeds in it, it’s large.”
- “It has a stem, and probably seeds in it, and it’s a pumpkin. I see lines on it too.” – L.A.
- “It’s really round.” – G.S.
Children used hands-on exploring while describing the outside of the pumpkin. They said the stem feels…
- “Bumpy”– OI, EC
- “Hard”– SF, MD
- “Rocky” – NF
- “Rough”– CW
- “Spikey” – HR
- “Warm” – HG
- “Heavy” – JL
- “Like splinter” – AW
- “Ouch” – CP
- “Ow” – ND
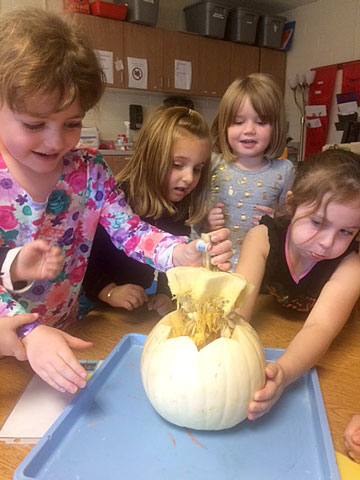
The children’s interest and engagement with the topic kept growing. Some of our students were interested in exploring real pumpkins. We brought in a variety of pumpkins as well as tools for inquiry that included balance scales, tape measurers, a gram scale, and magnifying glasses. Many of the children gravitated toward using the pumpkins as a way to learn about weight, measurement, and numbers. We even measured around the pumpkins and talked about the definition of the word circumference. The children labeled each pumpkin with its circumference.
Children were wondering what color the inside of our white pumpkin would be. We decided to cut open an orange pumpkin and a white pumpkin and see what they both looked like. We were excited and surprised to find that the insides of both were the same. We discovered they both have seeds and goop. (We later learned the name for the goop is pulp.) We started to wonder how food could come from the pumpkins. When we opened the pumpkins, we noticed a very distinct smell. Many of the children plugged their noses or complained about the way pumpkins smell.
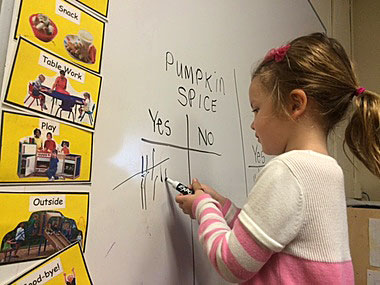
We started to talk about how to make pumpkin pies because this was a food the children often mentioned that could be made with pumpkins. We talked about the difference between a real pumpkin and a can of pumpkins. We also talked about different smells of pumpkin ingredients. We placed real pumpkin into a container, and in another container we put pumpkin spice. The children smelled each container and recorded how they felt about the smells. They were able to add a tally mark to the board after smelling each of the containers. We discovered more children in our class like how pumpkin spice smells and fewer liked the way real pumpkin smelled.
Most days, parents would send photographs from pumpkin-carving experiences at home or trips to the pumpkin patch. Before the children went home, we would have the children take turns explaining their picture and telling what they were doing in each of the pictures. The other children in the class would listen and have the opportunity to ask the children further questions about their photographs. We started to ask the children to generate a list of questions about pumpkins. We found out we were curious about a variety of different things regarding pumpkins.
At the end of the week I asked the children if there was anything else they wanted to find out. They came up with several questions. I asked them to make predictions about some of the questions. For the Pumpkin Project, the class developed a questions/predictions/findings chart:
| Pumpkin Questions | Predictions | Findings (added during Phase 2) |
|---|---|---|
| How do you get them into a pie? | “You have to cut them up really small and then you can just get them in there.” | The pumpkin has to be pureed or bought from a can. It needs to be added to other ingredients to make the filling for a pie. |
| Can you eat the seeds? | “Yes” | You can; most people prefer to add some type of seasoning. |
| What else do you put into the pie? | “Probably seeds, and just get it in the oven.” | The ingredients were pumpkin, pumpkin spice, evaporated milk, and sugar. |
| Where can pumpkins grow? | “At the pumpkin patch, or at the grocery store.” | Pumpkins can grow anywhere they have dirt and sunlight. They are sold in stores. |
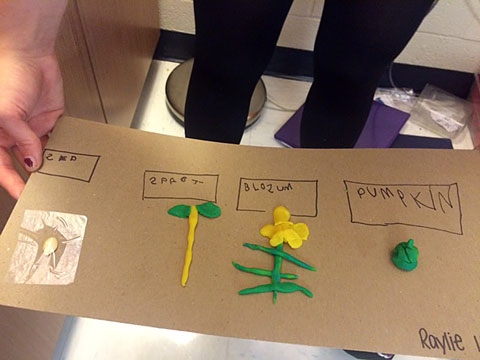
| How can they get bigger? | “I don’t know.” | They go through life-cycle changes, which include seeds, sprout, pumpkin plant, baby green pumpkin, and finally mature pumpkin. |
| Where can you get them at? | “The pumpkin patch or the grocery store.” | You can grow pumpkins outside or purchase them from the pumpkin patch or at a grocery store. |
Phase 2: Developing the Project
We had planned to have an interview with our expert, a farmer, but our schedules didn’t match. We conducted surveys, questionnaires, predictions, cooking experiments, and research. We then represented and reported our growing knowledge and understandings of pumpkins through art, model making, play, and in conversations.
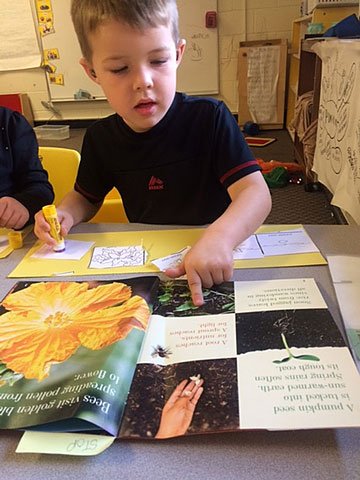
We were very curious about how and where pumpkins grew. We used several nonfiction books about pumpkins and learned about how and where pumpkins grew. We looked at pictures that depicted the various phases the pumpkin went through on its way to maturation. The children cut out the pictures and sequenced them in chronological order.
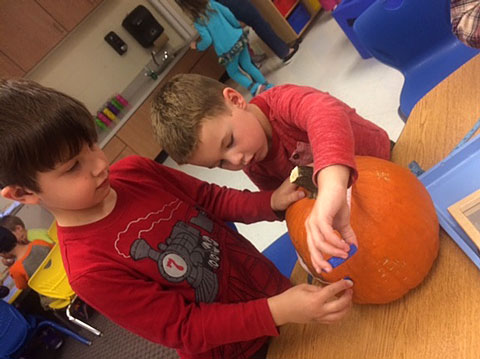
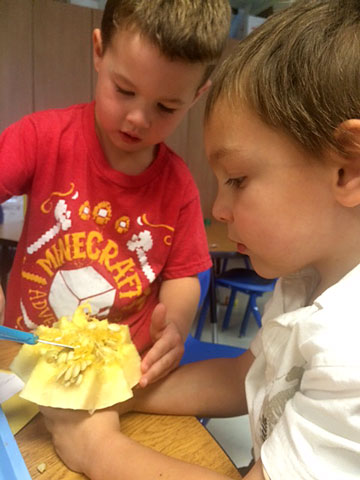
We then observed, touched, smelled, and tasted the inside and outside of the pumpkin. When exploring the inside of the pumpkin, we used multiple tools to open up the pumpkin.
Prior to using any of the utensils necessary for cooking a pumpkin pie, we gathered all of the utensils in our cooking center and encouraged the children to explore them. The children picked up various utensils and talked about them and what they thought they could be used for. Then, we encouraged the children to select one utensil that they found the most interesting and create a sketch of it. The sketches were all compiled along with an actual picture of the item and placed into a three-ring binder to be shared with families during our culminating event.
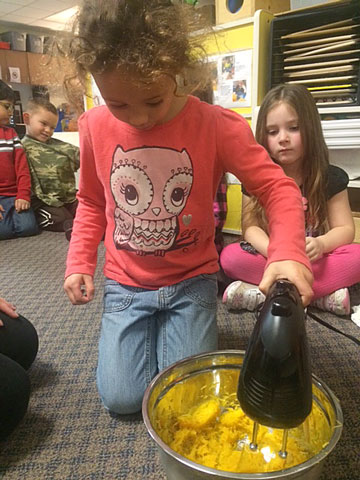
We talked about the differences between real pumpkin and canned pumpkin in pumpkin pies. We learned that the pumpkins that can be eaten are called sugar pumpkins. Also, we learned that we would first have to cook the pumpkin to make the pumpkin into the consistency we would need. Then you have to scrape the insides out. We used an electric mixer to puree the insides. Each child got to handle the mixer. They were excited to observe the change from pulp to puree.
Next, we represented pumpkins through paintings, clay models, sketching, and rubbings. After several opportunities to explore the pumpkin, we discussed what we eat that is made of pumpkin. The group consensus was pumpkin pie! We then predicted and documented how to make pumpkin pie and what utensils we need. Once our recipe was created we made the pumpkin pie!


After exploring the utensils we revisited our predictions on the ingredients needed for pumpkin pie. We compared our predictions with an actual pumpkin pie recipe and created a list for what we needed to buy at the grocery store. Once we had the ingredients for the pie filling and crust, we began the baking! We created the crust first by pouring the ingredients into a bowl and then stirring it all together. Next, we kneaded and rolled the dough! We used our hands and a rolling pin. Once our dough was ready, we placed it on the pie pan and used our fingers to spread out the dough.
After allowing the crust to cool, we mixed together our pie filling. We tasted the plain pumpkin filling prior to adding the other ingredients, and several children said they enjoyed the taste. Once we added some spices and milk, the children said, “Oh, this is better now! It’s ready!” We then placed the filling in the crust and placed the pie in the oven! We baked the pie together but then tasted the pie at our culminating activity, a preschool open house!
Phase 3: Concluding the Project
We asked the children whom they would like to share their new information with, and they chose their parents. We had been documenting our project all along and sharing it with our parents through the private Facebook group. We felt that it was so clarifying for families to come into our classroom and see how our knowledge grew. It was also fun and important to share with them how each activity encouraged developmental skills, including social emotional, physical, cognitive, language, literacy, and math skills. For our culminating event, we had an open house. The children worked very hard to bake a pumpkin pie to share with their families. When the families came, they were invited to move freely around the room looking at documentation and to eat pumpkin pie together!
Teacher Reflection
As we reflected on the Pumpkin Project, we felt there was room for both celebration and for growth. We were excited that children who were still acquiring language were able to explore the pumpkin through observations and activities. We were eager to learn through hands-on experiences such as pureeing pumpkins and baking the pumpkin pie together. One of our biggest hopes was that we would be able to include all children in the project regardless of their skill level. We used organized picture displays, video clips, and differentiated small and large group work tasks to make sure we were meeting the needs of all the children in the classroom.
The project gave opportunities for sketching. Most of our sketching was done with the objects in front of us. An area that we would like to grow in would be doing sketches from memory with the children. During observational drawing, we did get to see what details the children were really focusing on as they were sketching. After some of the sketches, we had the children stand in front of their classmates and explain the parts of their sketches. It provided a great opportunity to practice public speaking.
Throughout the project we made modifications based on what the children were interested in. We were disappointed when our expert visitor had to cancel. We worked around this by helping the children conduct research from books and different nonfiction passages and video clips. When the children would ask questions, we would look for different books that would have the answers to our questions to read in large group instruction. We noticed that the children were interested in how the pumpkins grew, but they also became very interested in how to turn the pumpkin into something edible.
In our program, the parents drop their children off in the foyer area of our school, so they do not enter our classroom on a daily basis. The culminating event gave parents an opportunity to experience the classroom itself as well as the Pumpkin Project through various documentations shared by the children.