
Karen McFadin and Kim Hack
Pershing Early Learning Center
Decatur, Illinois
2011
Our project on tools took place in a half-day prekindergarten classroom at Pershing Early Learning Center in Decatur, Illinois. Children attend for 2.5 hours in the morning or afternoon, 5 days a week. Thirty-three children participated in this project. The morning class included 5 children with Individualized Education Plans (IEPs) and 9 typically developing children for a total of 13; 4 were girls and 9 were boys. The afternoon class is a “general education” class with 20 children, two of whom have speech IEPs. Nine girls and 11 boys were enrolled in the afternoon class. In both classes, the age range was 3 to 5 years old.
Phase 1: Beginning the Project
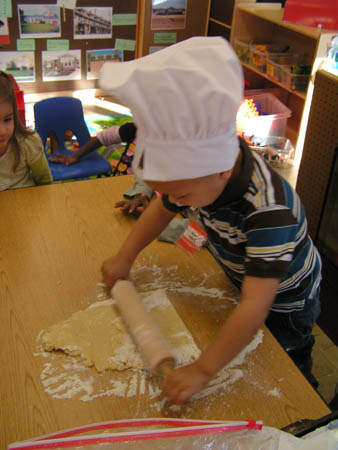
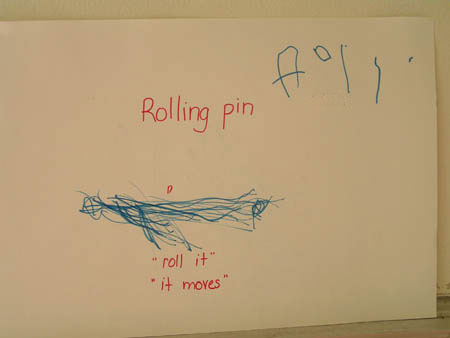
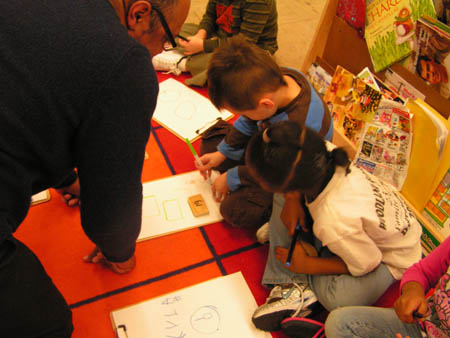
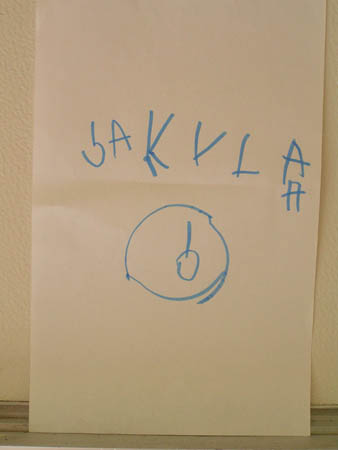
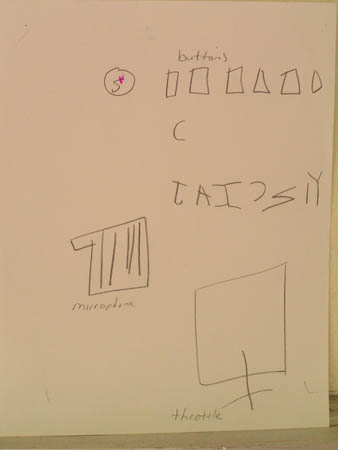
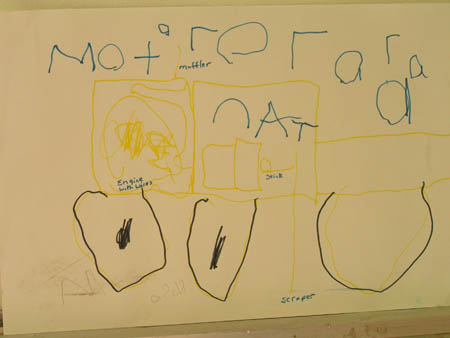
We did not intend to begin a project at this time. I had asked the children if they knew what a tool was. Since they had experience playing with the plastic tool bench in our room, they were familiar with tape measures, hammers, screwdrivers, and wrenches. They could name these tools but were not aware of devices used by other community workers that are also tools. I began by placing a bunch of real tools that different occupations use into a tub. As I read the story Whose Hat?, I had the children look inside the box and find the tools that were discussed on each page. Children had many opportunities to explore each tool. They also drew pictures of the tools (Figures 1 & 2).
We did not create a project web because at this point we did not realize we were starting a project. The project just blossomed out of the children’s interest and questions that came up in the following weeks.
Phase 2: Developing the Project
Involving Families in Fieldwork
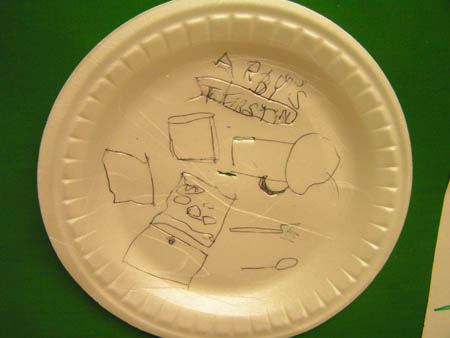
As a family/home connection, I asked parents to share stories about their jobs with their children and to show them what kinds of tools they (the parents) used on the job. I also asked parents to either send in their stories with a picture of a tool they used at work or come to class to share the story with us. Several stories were returned. For example, one of the mothers who works at Arby’s drew the tools she uses on a paper plate from the restaurant (Figure 3).
As each child shared his or her parent’s story, the children began to recognize and name more tools (Figure 4). The name of each tool was added to a list that we posted in the classroom.

Finding Answers to Questions
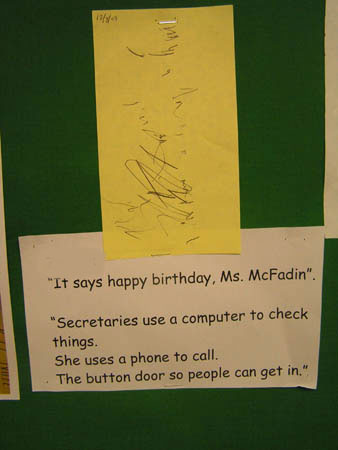
Questions began coming up. Ali was sitting at the writing center pretending to type on a keyboard one day and asked me, “Who uses this?” I asked him if he knew of anyone in our school who uses a keyboard, and he answered, “The people where the mail goes” indicating he had seen the school secretaries using a computer keyboard when he had taken messages to the office. I asked him if he knew what other tools the school secretaries use. He said he should go ask them. He went down to the office to interview them and came back and reported his findings to the class (Figures 5 & 6).

A Visit from a Guest Expert
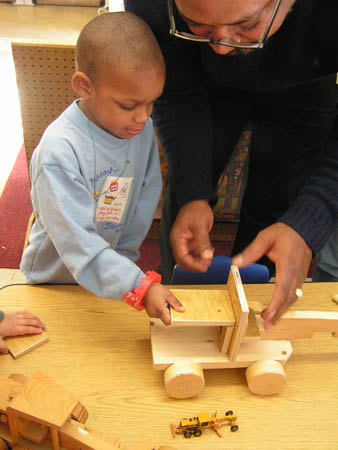
The children showed a particular interest in construction and frequently asked if they could use the real saw, hammer, nails, and wood. Because of this interest, we invited a representative from the Caterpillar plant in Decatur to visit our classroom to teach us how to make a plan and work together to construct something. Mr. Sykes came to visit the class. He taught us about assembly lines and the steps needed to assemble a motor grader from pieces. He talked about the 5-step process that is used at Caterpillar for assembling large machines such as the motor grader.
- Step 1: Draw the plan.
The first step is drawing a plan for the machine - Step 2: Talk about safety.
The second step involves discussing safety measures for the assembly process. - Step 3: Create an assembly line and assemble the motor grader.
Children lined up in order, based on the number that was on their part. They had to figure out who was first and who went next. They stood around the assembly table in that order and waited patiently until it was their turn to add their part. To help them see where each of their pieces should go, a small metal model of a grader was placed on the table where the children were working. - Step 4: Paint the grader.
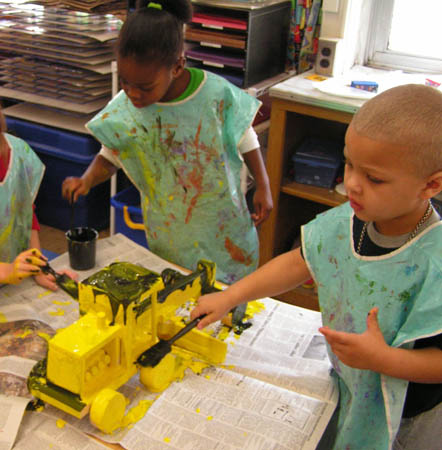
There was much discussion about how to paint the motor grader. Children used the book C for Construction to determine what colors to use and which parts to paint yellow, black, and white. A debate took place when it was time to paint the wheels. Kurt (4 years, 8 months) thought the tires should be yellow and black. He examined the book about Caterpillar tractors to support his opinion. “There’s yellow here and black out here,” he said (Figure 12). - Step 5: Put the brand on the final product.
When the models were complete, one child painted the word “CAT” on one of them. We displayed both models in the classroom.


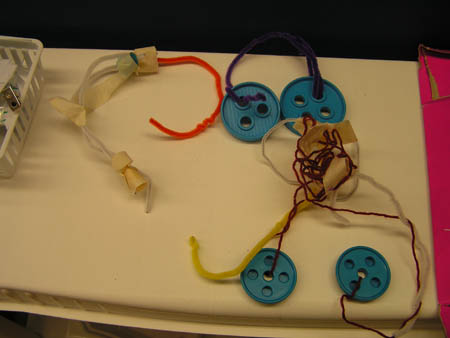
The children carried over the process they learned from constructing the graders to their next construction. We had a cockpit simulator in our room for 1½ weeks through the Air Bear loan program. When I told them it had to be returned to the airport, several children groaned. I asked them, “What can we do since you still want to play with it but it has to go back?” Jaylen suggested we make one. I asked him how we should do it, and he replied, “Draw it.” Several children got together and planned how they would start. They decided that each one of them would draw a different part and then make the part they drew (Figure 15).
I laid out some boxes of different sizes and told the children they could use anything in the room to create their parts. If they seemed to be stuck, I asked open-ended questions to help them think through the process. When they were trying to figure out what to use for headphones, I suggested that they look at the real headphones and then go over to rug work area to see if they could find something that might work. They found circles in a building set on their own and decided to use those (Figure 16).
The Air Bear prop box included a set of chocks, which are used to keep a plane’s wheels from rolling. At first, the children did not know what they were and couldn’t figure out how to use them. I told them that they are called chocks, and then we watched a video from the kit that included a demonstration of how they are used. The children began putting the chocks around their “pretend” wheels (chair legs).
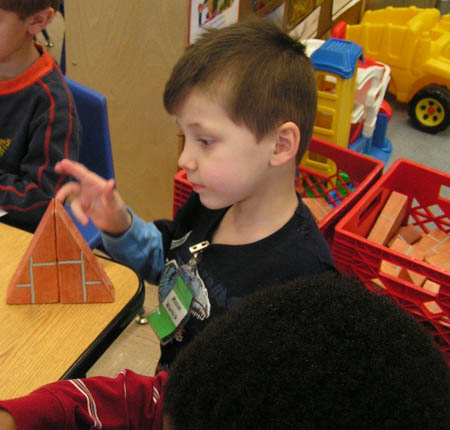
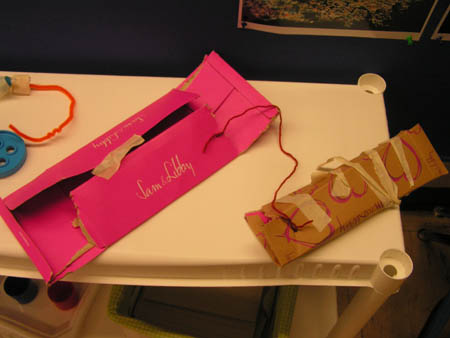
Some of the children decided that they would need to make chocks to keep the airplane wheels from rolling. Figures 17-19 show how they approached solving the problem. Martin suggested using triangle blocks to make the chocks (Figure 17). His classmates agreed, but they could not figure out how to connect the blocks. Ali suggested taping cardboard into triangles. Figure 18 shows Ali demonstrating his idea. The children liked this idea. They then used problem-solving skills to figure out which tool would be best to make holes in each chock so they could attach them together with yarn. Child scissors did not work. Neither did a tubelike toy. They discovered that a pencil worked well. Figure 19 shows the completed folded-cardboard chocks.
The class did not end up building a full airplane; by the time they finished the models of the cockpit and other props, their interest began turning in another direction. A couple of children did carry the idea of chocks over into the block area. One day, I noticed two of the boys putting blocks around their cars’ wheels so the cars wouldn’t roll down the ramp they had built.

Phase 3: Concluding the Project
Our project lasted about 6 weeks. Children began showing less interest in tools and more interest in snow because we had so much this year. We did not have a culminating event because their interest just sort of faded. The children’s work and pictures were posted on our hallway bulletin board, and parents were invited to come in and see the project. I also kept families informed in the weekly newsletter.
Children learned a wide variety of skills through this project. At the end of the project, they were able to identify all kinds of tools—from pencils and paintbrushes to mops to computers and rulers. They learned how to plan what they wanted to do before starting and how to collaborate with other classmates. Their language skills were enriched through their experiences of collaborating with others, conducting interviews, and sharing stories. They practiced their drawing and writing skills each time they drew a plan and drew a picture of a tool. They practiced their investigative skills as they learned how to look up information in books when they were not sure of an answer (such as figuring out how to paint the motor grader). They also learned teamwork and patience.
Teacher Reflection
I fumbled through a couple of projects last year, but this was my first attempt since taking the Project Approach training. I still did not start the project with a topic web as I was shown in the training because we were well into it before I really realized I was doing a project. This is an area I need to get a better handle on.
I stimulated the children’s interest in tools by bringing in a variety of props, but from that point, their interest guided me. The project seemed to flow naturally from one part to the other. By paying close attention to the children, I was able to keep the interest level high for quite a while. The children took what they learned into their interactions in the block area, rug area, and the art area. They started looking at things more closely and started paying attention to details in their constructions and drawings. I even noticed a difference in their interactions with each other. Although they do not always accept another’s opinions, they have begun to listen to each other and debate their opinions. They have also begun to support their opinions by using pictures, books, teachers, and other available resources.
What surprised me the most were the pictures of the motor grader that children drew after we had built it. The detail they used illustrates how much their understanding is improved when they are invested in the project (Figure 20).
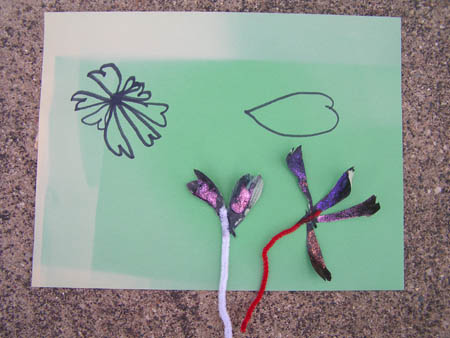
Another thing that surprised me was how much of this experience stuck with some children. For example, a month after the project had ended, Aiana (4 years, 11 months) spontaneously drew a plan for creating a 3-dimensional milk carton. She drew it, cut it out, and used tape to construct it. This activity was initiated entirely on her own. Then a few weeks later, the same child used a shamrock plant as a model, drew a plan for it on paper, then constructed a 3-dimensional shamrock plant (Figure 21).
Each child was able to construct a present for a family member by sawing a block of wood, sanding it, painting it, and nailing a clothes pin to it to make a picture holder. They would have enjoyed being able to build other things with the real tools, as well. If I did this project again, I would check with our local lumberyard to get wood scraps for the children to use in building their own constructions.
Acknowledgments
The cockpit simulator was on loan from the Decatur Airport. Teachers can check it out free of charge and use it for 1 week. We were able to keep it an extra week because no one had reserved it for the week after us. I learned about the cockpit simulator loan program many years ago (probably from another teacher) and have tried to get it every year. Teachers can call the airport manager’s office and ask to reserve the Air Bear program. Teachers need to pick up the kit, preferably with a truck or van. The simulator is not heavy but is very big and awkward. The simulator comes with a very large rolling tub (like a foot locker) full of props.