

Julie McGovern
Madison Early Childhood Center
Elmhurst, IL
The Here a Chick, There a Chick! project took place over seven weeks with students in our afternoon session. Our students range in age from 3 through 5. Sixteen students participated in this project. Of those 16 students, five students had Individualized Education Programs (IEPs), four students had speech-only IEPs, two students were English language learners, three were Preschool for All (PFA) students, and five were tuition-based students. All but one child was going to kindergarten the following year. Funding for our program is provided by the local school district, the statewide PFA program, and tuition.
Many adults collaborated to support the successful participation of this diverse group of students, including:
- Julie McGovern (early childhood special education teacher)
- Anna Robins (speech-language pathologist)
- Andrell Thurmond (teacher assistant)
- Theresa Perry (teacher assistant)
- Hannah Klespitz (student teacher from Elmhurst University)
- Sarah Pappas (instructional coach)
Phase 1: Beginning the Project
In the past, I have hatched chicks in my classroom using a more thematic-based methodology. I arranged to pick up fertilized eggs from a local farm, incubated them in my classroom, and then returned the hatched chicks back to the farm when they were about one week old. All the center time activities and circle time lessons I planned were based on this chick theme. Looking back at these earlier experiences, I sensed something was missing, even though the unit of study seemed comprehensive at the time.
When starting my third time hatching eggs with my students, I planned to follow the three phases of the Project Approach to make the experience more relevant and purposeful for my students. In early March 2022, I took advantage of a snack time conversation to spark the students’ interest in the topic. I overheard several of the children talking about Easter candy. I joined the conversation and asked, “What’s a peep?” A student replied, “It’s a baby chick!” I pretended to not know about peeps and acted confused. “Is a peep a real baby chick?” I asked. “No, silly. It’s a candy chick,” one of the students replied. I asked, “Where do candy chicks come from?” They all chanted, “From a store.” I used the next question to prompt the children and find out if they knew baby chicks come from the eggs laid by a hen. “Well, then where do real baby chicks come from?” I questioned. A few moments later a student responded, “From the farm.” No one mentioned anything about an egg.
I sent a note home to parents letting them know that later in the spring we would be incubating eggs and hatching baby chicks. I explained that it takes 21 days for the eggs to hatch. I let parents know that once the eggs hatched, the students would be able to touch and handle the chicks, and I asked parents to please let me know if they did not want their child to handle them. In the note, I also asked if any family members had experience with raising chicks, because we were looking for a “chick expert” to come to class. One parent said they had a family member out of state that lives on a farm and could perhaps answer questions via Zoom.
To build more excitement about this topic, I planted a few items in our classroom to accelerate the students’ curiosity and to help me learn about their background knowledge regarding the life cycle of a chick. I placed a nonfiction book in the science center. I also added a windup chick and a pretend egg to a counter between the dramatic play and block areas so students could use it during centers as they were playing. Lastly, I positioned a box on a shelf at the front of our circle time rug. On the cover of the box was a photograph of eggs inside an incubator. That small act of adding a few props to high traffic areas of the classroom was just the boost we needed to elicit student curiosity.
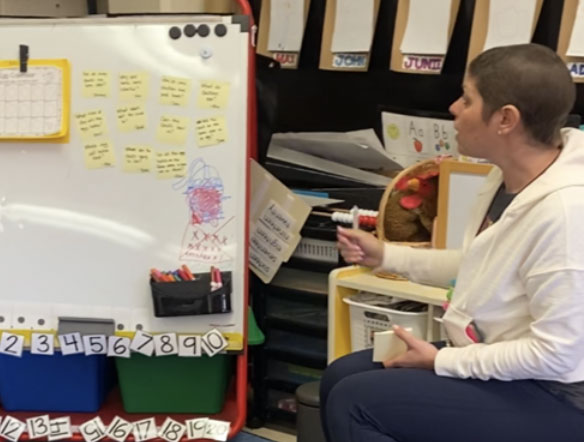
Our team spent a few days collecting language samples from conversations around the classroom about eggs and chickens. Based on this, we realized the children had some understanding of the correlation between an egg and a chicken but likely did not understand that there was a complex process of development that happened inside a fertilized egg. One day during circle time our speech-language pathologist asked the children, “What do you know about chicks?” As students shared their thinking, teachers wrote down their responses on Post-it notes, labeled them with their name, and placed them on the teaching easel for all to see. This helped motivate students and encouraged participation. Additionally, this strategy documented our conversation and made it easier for me to categorize student responses later on when I was selecting learning objectives/topics for planning purposes.
As we were wrapping up for the day, one of the children asked, “What is that thing for?” as they pointed to the box with the incubator. I explained to the children that inside the box was an incubator, which is a machine that acts like a mother hen keeping eggs warm while a baby chick is growing inside. I also announced that over spring break I would be getting eggs from a farm to put in this incubator. Needless to say, they were extremely “eggs”ited. During spring break, I picked up 12 fertilized eggs from the farm, brought them back to the classroom, and put them in the incubator. The heat from the incubator started the process on the Saturday before our return to school.
When students walked into the classroom the following Monday, they noticed the eggs in the transparent incubator. Of course, they were anxious to get a closer look and accidentally bumped into the cabinet holding the incubator, which rocked the eggs inside. I explained what might happen to the chicks inside if an egg should crack before it was ready to hatch. Some of students were worried about the eggs breaking.

I asked the students if they had any new questions now that they had seen what the eggs looked like. One student recognized the eggs were different colors and sizes. I responded by saying, “I wonder why the eggs are different colors and sizes. Is this something we might want to find an answer about? How can I say this as a question?” I knew at some point during our inquiry I would want to address this observation, so I wrote it down. Another student noticed the water source next to the incubator and asked, “Why is there water?” I told them water is important to help with humidity levels and that all living things need water.
I had marked the eggs with Xs and Os. A student asked, “Why are there Xs and Os on the egg?” I told them I did this to make sure the eggs rotate within the incubator. I referred back to the explanation of the hen sitting on the egg and how at times the hen will turn the eggs over with her beak to warm the other side of the egg. I was trying to get the students to understand and visualize that the incubator is supposed to act as the hen sitting on her eggs. We wrote their questions on individual speech bubbles to showcase our learning on our project history wall and then used these specific questions later on to fuel our investigation.
Some of their questions included:
- How long does it take for the egg to hatch?
- What time of day will the eggs hatch?
- Does the mama hen miss the eggs? (that the farmer takes away)
- Why are the eggs different colors and sizes? (teacher-generated question)
- Will the chick be the same color as its egg?
- Are all baby chicks the same color?
- Are the eggs at a store the same as the eggs on a farm? Which ones have a chick growing inside? (from same student)
- A teacher question: Can the chicks hear us from inside the egg?
A few days had passed, and the children now had more exposure to our project topic. I wanted to create a web of what they knew about the process of chick development. Unfortunately, I have the tendency to fixate on how the web looks rather than focus on the process of inquiry that takes place. As a veteran teacher, it can be difficult to recognize my personal challenges. It is not easy to admit when you need support or guidance yourself. But, in doing so, I demonstrated the importance of embracing a growth mindset to my students. Isn’t this what real scientists do? I enlisted the support of my instructional coach, Ms. Sarah, to co-lead our next discussion and help me organize student responses. Here are some examples of what the students already knew:
- “Chicks hide inside eggs and the mom sits on them!”
- “Inside the egg, the baby chick is purple.”
- “When an egg cracks, the baby chick will come out.”
- “First inside the egg, there is a little circle. Then the chick grows, and grows, and grows until it gets bigger. Then the hen sits on the egg to keep them warm.”

Ms. Sarah and I worked together to use the responses to guide and plan the investigation. We met after school to reflect on what the students already knew. She reminded me to think about what I wanted my students to learn by the end of our project. I came up with three learning objectives:
- There are specific phases of development during the egg incubation period.
- The life cycle of a chicken from egg to chick, to adult hen/rooster, then egg.
- How to care for the egg and chicks.
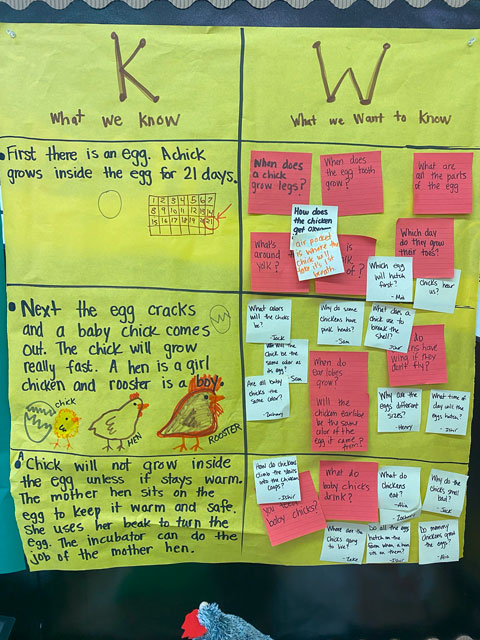
With these three learning objectives in mind, we created a chart and used ideas from the student web (Figure 4) to categorize the information that students already knew in the K (what we know) column. Next, we referenced the “speech bubble” questions that students had already asked and copied them onto Post-it notes and sorted and placed them in the W (what we want to learn) column to help focus my plans for project activities and experiences that occurred in Phase 2.
Phase 2: Developing the Project
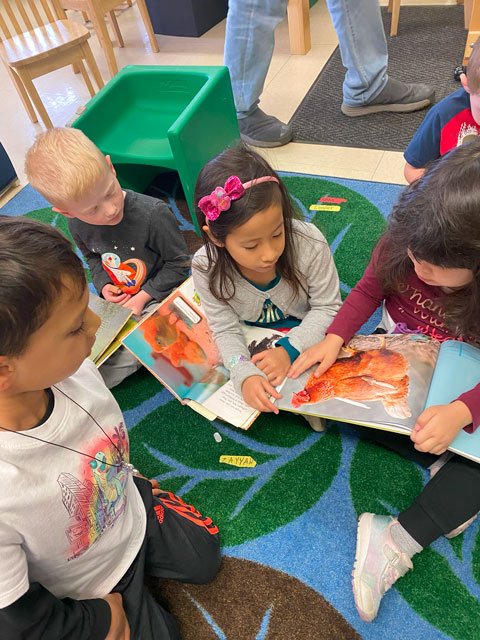
Throughout our investigation, we started each day looking at nonfiction texts that I checked out from the local public library. The students were eager to compare photos from different books with one another and learn new, interesting facts about eggs and chick development. They found many answers to their questions using these resources, and I helped them document those answers on the project wall.
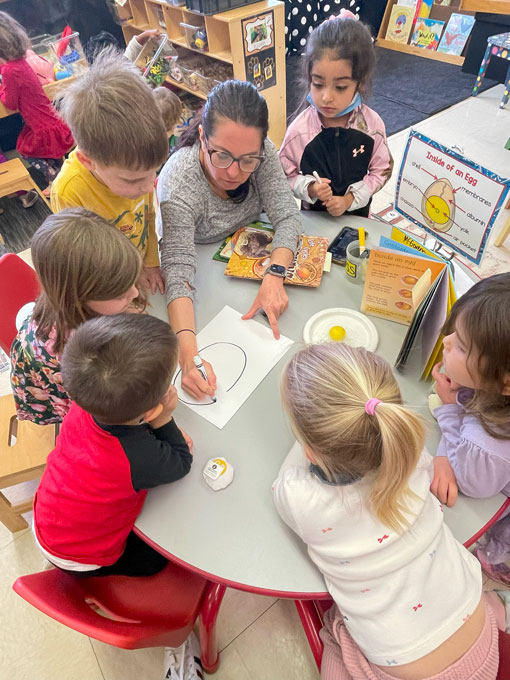
In small groups, I gathered students and cracked open a store-bought egg to examine its components. We acted like real scientists and looked up information in their nonfiction texts to help them identify and label the parts of an egg. I drew a model of an egg highlighting the new vocabulary words on a chart, which we later posted on our project history wall. The students immediately began using this new terminology as they chatted with their peers.
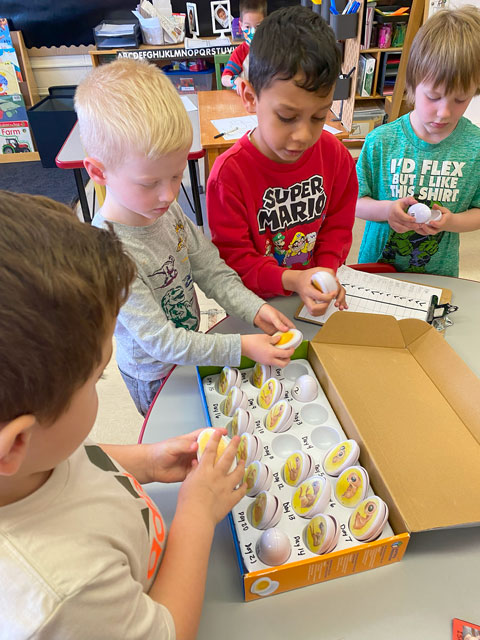
Using a chick life-cycle exploration set, the students were able to notice changes in the day-by-day development of a chick embryo. Each day during circle time we used the linear calendar in our classroom to demonstrate the date of development of our incubated eggs. Later on, during center time, children would take turns announcing details of the daily growth of our chick embryos to their peers and conducted surveys about their observations. We also watched a time-lapse video of a chick embryo developing and hatching on YouTube. Afterward, several students were inspired to record this with observational drawings.
On a Zoom call with a chick expert from a farm, we learned that farmers or people incubating eggs can find out whether eggs are viable by “candling an egg.” We candled all 12 of our eggs and concluded that 9 of the 12 were viable. We used that information to make predictions about our eggs. We numbered and photographed each egg. We asked students to predict whether the egg would hatch, and if they said yes, we asked them what color they thought the chick would be. We used tally marks to represent their answers. We summarized the prediction chart during circle time with the whole group.

Several days had passed, and it was time to prepare for hatch day. We gathered the students and asked them what they thought the baby chicks would need once they hatched. With some comparisons and adult prompting, we generated a list of materials. From our candling experiment, we knew it was possible that 9 of the 12 eggs would hatch.
Several of the children thought that putting all of the hatched chicks into one box would not be good. It would be too crowded. We decided to set up two brooders and divide the chicks so they would have more space. We added bedding, food, water, and a heat source to each space. Now all we had to do was wait.
We conducted an interview with our second chick expert, a school staff member whose parents have a small farm and raise chickens. She explained that the chickens at her parents’ farm were adult chickens who lived in a fenced off area in a chicken coop. One of the children asked why there was a fence around the coop. She explained that there are several animals (not ones that live on the farm) considered to be predators to chickens and asked the children if they could guess which animals might prey on chickens.
Our expert explained that farmers have to be strategic about where they build the chicken coop. Several students were interested in finding a map of a farm. After a quick Google search, these students started to create farm maps. This conversation sparked several ideas about the importance of creating a safe environment for chickens and many suggestions for a remodeled chicken coop. We decided this would make a perfect STEM challenge for our students, which proved to be a great distraction while we waited for hatch day!
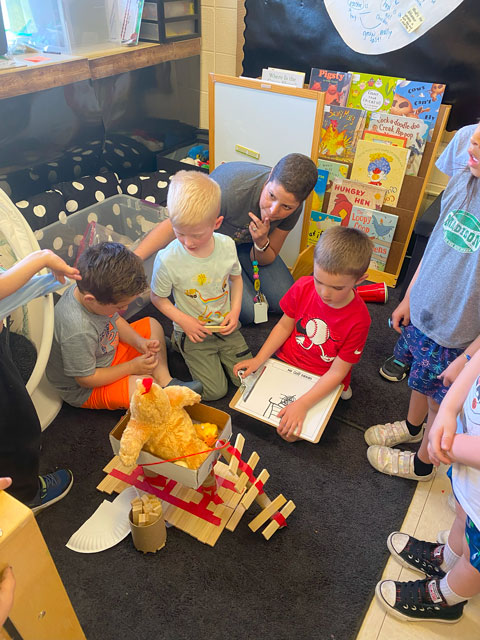
The very next day, we divided the students into four groups and gave each group a specific box of materials to use to build a chicken coop that could house an adult chicken, a chick, and an egg. Each group would have a recorder (a student who would draw the plan), a communicator (a student who would share out the details of the plan to the whole group), and two builders (students who would build the coop). Each group had an adult helping to facilitate the challenge.
I was so amazed at the outcome of this activity. All students were actively engaged in the design and building of their chicken coop. The activity was very meaningful for the students, given the discussion about predators of chickens with our chicken expert the prior day. They were highly motivated to keep the chickens safe. Each group used the materials in a creative way and offered a detailed explanation of their plans. The adult facilitators reported that each group worked in a thoughtful and collaborative way with their teammates.
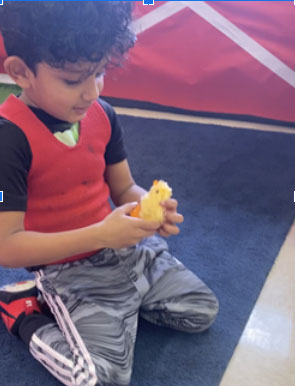
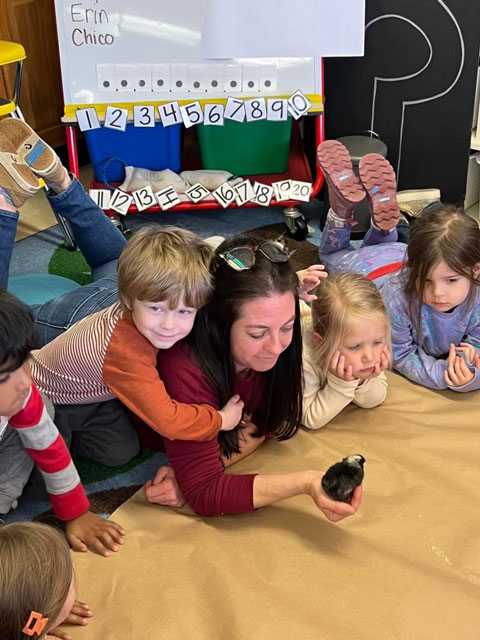
Unfortunately, the eggs started to hatch on a Saturday afternoon. Luckily, we had anticipated this and set up cameras to stream the hatching live. I communicated the live stream information with the students’ families, and many of them watched over the course of the weekend. The classroom was buzzing with excitement on Monday when students arrived. As predicted, all nine of the viable eggs hatched. We placed four chicks in one brooder and five chicks in the other. The students spent quality time observing the chicks, noticing all the details and talking about what they had learned. They shared their suggestions for chick names, and we took photos of each chick with their new name. We shared this information with our students’ families and posted these visuals near the brooders. The students spent the next few days creating directed drawings and 3D representations of their favorite chicks, which was a fantastic way to transition out of Phase 2.

Phase 3: Concluding the Project
We spent five days with the hatched chicks, which may seem like a short amount of time. However, baby chicks require consistent attention and care. These added responsibilities for classroom teachers can be time consuming. Certainly, there may be some who have the space and ability to maintain healthy, classroom chicks for longer, but I have found that after about a week the chicks have begun to outgrow their box and develop personalities that require more space and freedom to move around.
Because there was so much family and community interest in the rearing of baby chicks, I decided a great way to showcase our learning would be to invite families and school community members to an open house. We allotted a short window of time where the children could escort their families along our project history wall and talk about their involvement and chick knowledge. The visit would conclude with the opportunity for families to visit with the chicks. We explained to the children the day before the event what their role would be by modeling a walk-through. Teachers were stationed along the path to encourage students to “explain” their artifacts as they walked along the project wall. Almost all students had family members attend the open house, and it was wonderful to watch the children take ownership of their learning.
I took the chicks back to the farm the next day, which was a Saturday. The farm is open to the public and runs a program with the help of local volunteers on weekends. I arranged a specific time with the farm to hand off our chicks and watch as they transitioned into a special brooder for younger chickens. I shared this information with student families as an optional event and suggested that if they choose to come, they could plan to stay and tour the farm. We did have several families and staff members join us to say goodbye to the chicks.
Teacher Reflection
As I compare the different teaching methods I have used when hatching baby chicks (thematic-based versus Project Approach), I am convinced that a project-based approach to learning generates a more meaningful and comprehensive experience for diverse students. Students who might not contribute to large group conversations were more likely to express or share their knowledge during informal conversations or unstructured play time. I made sure to include their contributions during whole group discussions.
Overall, the level of student engagement was off the charts, especially for children with sensory or attention challenges and delayed social skills. As a result, it was quite noticeable that teachers spent less time managing behaviors and more time promoting independent thinking and creativity. Additionally, I was quite surprised to watch several small inquiries erupt during our investigation phase. Allowing students to follow their interest in maps and construction was easier than I anticipated. As the project facilitator, I offered options and suggestions. The students took on a more dynamic role in the classroom, and it was so rewarding to witness their growth, especially those who were transitioning to kindergarten.
Like many teachers, I struggle with the idea of giving up control in my classroom. I want everything to look a certain way, and when my expectations do not turn out the way I want them to, my spark and confidence as a teacher plummets. However, the more I choose to implement project work, the easier it is for me to give up control in my classroom. Asking for support from a fellow teacher, service provider, or instructional coach has helped me embrace the role of facilitator with fidelity. Of course, there are some non-negotiable areas I will continue to manage, but when it comes to regulating student learning, I am beginning to let it go!